
We’ve all experienced the thrill of defying gravity on a skateboarding ramp. Now, you can bring that excitement to your own homes and backyard with our DIY guide on making your own skateboarding ramps!

- We’ll guide you through constructing, assembling, and perfecting your homemade skate ramp to make the most of your available space. With patience, tools, and this step-by-step guide, you’ll be soaring through the air on skate ramps in no time! Read on to learn how to build a skateboarding ramp.
- Building skateboarding structures isn’t just about crafting wood and screws – it’s about fostering community spirit by creating fun and physical activity spaces. And, of course, safety is always paramount, so let’s start creating memories! So strap on your helmet, and let’s unleash your inner daredevil.
Key Takeaways
It’s time to put your hard work and planning your homemade skateboard ramp to the test and defy gravity with your creative idea!
- Like any extreme sport, skateboarding comes with a certain level of risk, so take the necessary precautions and enjoy the ride! This comprehensive guide will help you every step of the way, from design to installation.
- From homemade halfpipes and quarterpipes to new features of your mini skateboarding ramps, plans to build your own pipe are essential to the skateboarding experience, allowing you to grind and master your tricks.
- Pick a homemade skateboard ramp design that fits your skill level and use the right materials for construction. The homemade skateboard ramps should be well-built and sturdy enough to handle the skateboarder’s weight. Remember to take safety precautions, such as padding for the edges and handrails and making sure the surface is smooth and even.
We want you flying high on your skateboard and having fun, not landing hard, so make sure to invest in good skateboarding stuff for those final touches and safety precautions. Now it’s time to grab your skateboard, strap on your helmet, and start shredding all the length of the skateboard ramp!
Designing The Homemade Skateboard Ramp Of Your Choice
There’s nothing quite like the exhilaration of designing your homemade skateboarding ramp, where you’ll soon defy gravity and push boundaries. As you design your DIY mini ramp, there are several important considerations, such as skateboard size, shape, material, budget, and location. Whether you’re planning a mini ramp DIY project or a ramp DIY halfpipe, it’s crucial to choose the right materials and measurements. With the right planning, your DIY mini ramp can become the perfect addition to your skateboarding adventures.
We’ll focus on the aesthetics and location considerations of structures to create something that looks great and works perfectly.
Choosing The Right And Best Materials For Your Skate Ramp
- When it comes to building your own homemade skateboard ramp, selecting durable materials like pressure-treated wood is a crucial step.
- We will explore the different types of wood and their uses, helping you find what will best withstand your skateboard’s wear and tear.
- Whether you choose wood, plastic, metal, or another material for your mini ramp DIY project, it’s important to consider the skateboarder’s experience, the skateboard ramp’s durability, and the cost. When planning a ramp DIY halfpipe, these factors become even more critical to ensure safety and longevity.
Wood Types And Their Uses For Skateboard
Choosing the right wood, such as pressure-treated pine, plywood, oak, cedar, or marine-grade plywood, for your homemade indoor skateboard ramp isn’t just about aesthetics; it’s a crucial decision that can significantly impact the skateboard ramp’s performance and longevity.
- When considering lumber selection, prioritize wood durability, such as pressure-treated pine, oak, cedar, or marine-grade plywood. These materials can withstand weather conditions and heavy use.
- With our wood chosen wisely, let’s focus on another pivotal aspect of our project: selecting the necessary hardware for your homemade skateboard ramp.
- When selecting hardware, including screws for drilling steel, consider factors like durability, weight, and strength.
- When constructing a DIY skateboard, mini ramps, wide pipe ramps, grind rail, or any other skateboard features like pipe ramps or kicker ramps outdoors, it’s crucial to ensure that the hardware, including screws, steel, drill to cut, concrete you select, along with the mini ramp plans and skateboard ramp plans, can handle both the ramp pressure and the skateboarders’ weight.
- Building a skateboard DIY experience requires attention to detail and the right materials.
Essential Hardware For Building A Skateboarding Ramp
When building a homemade skateboard ramp, don’t skimp on the quality of the hardware. Investing in rust-resistant skateboard screws and brackets will help ensure the safety and longevity.
We recommend exploring cost-effective options that don’t compromise on quality or durability. Making wise decisions here will pay off and help you spend more time on the exciting part of the project—combining all the elements and creating your homemade skateboard ramps.
Assembling The Materials For Your Skateboard Ramp
- Now that we’ve chosen the right materials, it’s time to get hands-on with our project. We’ll start by cutting the two sheets of wood accurately, ensuring each piece matches our design specifications for a smooth and reliable surface.
- Constructing the frame for our mini ramp DIY will be our next big step, where we’ll use a tape measure to ensure precision and piece together our cutouts into a solid structure that looks good and can withstand some serious skate action. Whether it’s for a simple ramp or a more complex ramp DIY halfpipe, accuracy and sturdiness are key to a successful build.
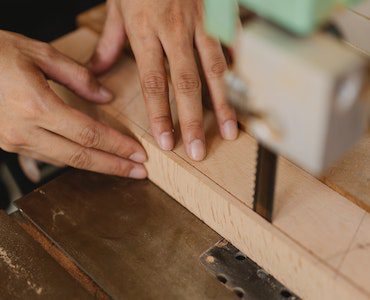
Cutting The Wood
It’s time to start slicing into that plywood and building the backbone of your future homemade skateboard ramp! Here’s the process we recommend:
- Wood Conditioning: Make sure the wood is dry and free from knots.
- Tool Selection: Choose a sharp, reliable jigsaw.
- Safety First: Always wear protective gear.
- Precision Cutting: Follow your measurements carefully.
Cutting the wood straight correctly is essential to building a safe and effective homemade skateboard ramp. With the right tools, including a steel pipe for additional support, and safety measures, you can confidently cut the wood and move on to the next step of making your homemade skateboard ramp.
Constructing The Frame For The Ramp
- After you’ve expertly sliced your plywood, it’s time to dive into the fun part – piecing together the frame for your future homemade skateboard ramp.
- We need to ensure frame durability and consider location considerations. Use strong, weather-resistant materials like aluminum, steel, and fall sheets, and make sure the homemade skateboard ramp’s starting point is on a flat, stable area.
Installing The Surface
- Now that your homemade skateboard ramp skeleton is in place, it’s time to cover it with a surface that’ll have your skateboard wheels humming.
- We suggest using plywood as the top layer because of its durability.
- Remember to paint the skateboard ramp, too! Use high-quality outdoor paint for the base coat, and stencils or freehand for detailing and custom designs.
- You can add those fantastic finishing touches after the construction of your homemade skateboard ramps.
Finishing Touches To Add
- Adding personal finishing touches to your skateboard ramps is a great way to make them uniquely yours! We understand that skateboard ramp aesthetics are the cherry on top, and we offer many painting options that add personality and flair.
- But remember, it’s not just about looks. A well-finished skateboard ramp is safer and more durable. So, take important safety precautions to ensure your skateboard ramps are as safe as they are beautiful.
Safety Precautions
- As we explore the world of DIY ramps for skateboarding, we must remember safety precautions. Checking for stability is a crucial first step; we can’t stress enough how important it is to ensure your DIY skateboard mini ramp won’t give way under pressure.
- And let’s not underestimate the value of using proper gear when testing out our newly built skateboard ramp – helmets and pads could make all the difference between a successful test run and an unfortunate accident.
Checking For Ramp Stability
Ensuring your homemade skateboard ramp isn’t just about safety—it’s about securing the thrill and freedom that comes with every skateboard ride. Starting with a solid foundation in the ground and drilling holes strategically placed for stability and precision drill work is crucial. That’s why we want to discuss the importance of mini ramp DIY durability. Skateboard ramp durability relies on the quality of materials, solid construction techniques, regular maintenance, and careful site selection, especially when building a more complex structure like a ramp DIY halfpipe.
- A solid ramp with two top layers gives us the confidence to stand and push our limits. To ensure that your DIY ramp can deliver and measure your expectations, start with a thorough visual inspection of the place, checking for any damage or weak points.
- Test its stability by applying gentle pressure and ensuring minimal movement or flex. Consider recording a video of the inspection to review any potential issues closely. Sign off on each step to ensure thoroughness, and remember that good maintenance stores up safety for the long term. Regular checks every quarter will help maintain its integrity and your confidence.
- Examine support structures, ensure an even surface, and consider weight capacity. Perform test runs with caution to assess its performance under skate conditions. Regular maintenance and seeking advice from experienced builders can help ensure a safe and stable mini ramp with added support for skating activities. Skateboarders must wear the right protective gear when testing out their sturdy new structure.
Using Proper Gear When Testing the Ramp
Before taking your first ride on your newly constructed homemade skateboard ramp, it’s essential to make sure you’re properly outfitted.
- Protective gear such as helmets, elbow pads, knee pads, and wrist guards keep you safe and can improve your skate experience. It’s important to ensure that all your gear is in working order; well-maintained covered protective gear, along with a flat section for testing purposes, will protect you and maximize your performance.

- Skateboarding can be thrilling, but it’s important to remember that safety always comes first. We’re all responsible for creating a safe skate environment for everyone.
- Additionally, a skateboarder should have the right skateboard setup, such as a board with the proper size, shape, and wheelbase, as well as the right wheel size, durometer, and hardness. Finally, the right shoes can make a huge difference in your skate experience, providing grip, flexibility, and support.
- With the right protective gear and skateboard setup, you’ll be ready to enjoy a safe and fun skate experience.
Conclusion
It’s time to put your hard work and planning to the test and defy gravity while skateboarding on the ramp.
- We’ve shown you how to construct your own skateboarding ramp, from design to installation.
- Pick a ramp design that fits your skill level and use the right materials for construction.
- The skateboard ramp should be well-built and sturdy enough to handle the skateboarder’s weight.
Now it’s time to strap on that helmet, grab your skateboard, and start shredding the width line! Like any extreme sport, skateboarding comes with a certain level of risk, so take the necessary precautions and enjoy your skateboard ride! If you’re looking for inspiration, you can find countless video tutorials on Google showcasing amazing tricks on quarter pipes and halfpipe ramps. For those lucky enough to have a backyard, building your own ramp can offer hours of free entertainment. Don’t forget to explore various ramp features to make your skateboarding experience even more thrilling!
Frequently Asked Questions (FAQs)
What Can I Use To Use To Make A Skateboard Ramp?
- You’ll need materials like plywood, lumber, steel coping, screws, and paint to construct a skateboard ramp.
- Plywood is used for the skateboard ramp’s surface, while lumber provides structural support.
- Steel coping is used for smooth edges, and screws secure the components.
- Paint is applied for a smooth surface, and safety gear like helmets and pads is essential.
- Various tools are required for construction.
- Ensure safety standards and local regulations are followed when building a skateboard ramp.
How Do You Make A DIY Skateboard Ramp?
Follow detailed how-to guides or online tutorials with step-by-step instructions to make a homemade skateboard ramp. Quarter pipes are popular for homemade skateboard ramps and can be built with basic tools and materials. As you build more skateboard ramps, you can experiment and refine your techniques to develop and enhance the quality and improve new designs.
How Do You Build A Ramp At Home?
- To build a ramp, you can use high-quality building materials like plywood, lumber, screws, and tools like saws and drills.
- Constructing a mini ramp involves designing its size, gathering plywood and lumber, and building a sturdy frame based on your plan.
- Attach outdoor-grade plywood to form the surface, carve smooth transitions, and optionally add coping for skateboard side and bottom tricks.
- Emphasize safety by smoothing flat edges, applying sealant, and conducting a thorough inspection.
What Is The Best Material For A Skateboard Ramp?
The best material for a homemade skateboard ramp depends on various factors such as budget, location, and intended use. Lightweight and durable materials like plywood or plastic may be preferred for a portable skateboard ramp. However, pressure-treated lumber and plywood can provide better longevity and stability for permanent installations or larger ramps. Consider age-appropriate matters, such as using a small transition and a layer of masonite, if the skateboard ramp is intended for younger skateboarders to ensure their safety and make it a bit easier for their enjoyment. Secure everything with a screw to ensure stability.
How To Make A Mini Ramp?
To make a mini homemade skateboard ramp:
- Begin by designing its dimensions and gathering materials like plywood and framing lumber.
- Construct a sturdy frame, attach outdoor-grade plywood for the riding surface, and shape smooth transitions for skateboarding.
- Optionally, add coping for skateboard tricks.
- Prioritize safety by sanding, sealing, and inspecting the mini ramp for any issues.
- When using the ramp, always wear appropriate safety gear.
- If you’re new to construction, find guidance from experienced builders or online resources for detailed plans and construction tips.
What Materials Do You Need To Make A Skateboard Ramp?
To build a homemade skateboard ramp, you will need materials such as plywood, pressure-treated lumber, screws, and exterior paint or sealant for protection against the elements. Be sure to refer to appropriate “how to” and guides to avoid common mistakes and ensure safe and sturdy construction. Consider the age and skill level of the skateboarders who will use the skateboard ramp to ensure it is appropriate for their abilities and safety.
How Do You Skate A Mini Ramp?
To skate a mini skateboard ramp effectively:
- Start with the right stance and approach the ramp with sufficient speed.
- Use your body’s movements to pump and generate momentum as you ride up and down the ramp’s transition.
- Maintain balance by leaning into turns and keeping your knees bent.
- Gradually progress from basic movements to tricks and transitions, always wearing safety gear like a helmet and pads.
- Respect skatepark etiquette and other skaters. Practice and patience are key to improving your mini-skate ramp skills.
What Are Strong Materials For Skate Ramps?
Strong materials for building homemade skateboard ramps include:
- Plywood for the riding surface
- Pressure-treated lumber for the framework
- Steel components like coping and railings for reinforcement.
- Concrete and specialty materials like Skatelite or Masonite can also be used for certain applications.
- Appropriate materials and proper construction techniques are crucial for creating a durable and safe skateboard ramp.
- Regular maintenance is essential for the long-term use of your homemade skateboard ramp.
What Is The Slope Of A Skateboard Ramp?
- The slope of a skateboard ramp is the angle of incline between the flat bottom and the vertical portion of the skateboard ramp.
- This slope determines how steep or gradual the skateboard ramp’s transition is and directly influences the ramp’s performance for different types of skate maneuvers.
- Common slope measurements for skateboard ramps range from around 6 degrees (mellow) to 8-9 degrees (medium) for mini skateboard ramps and 10-12 degrees (steep) for larger skateboard ramps or halfpipes.
What Is A Skate Ramp Called?
A skate ramp can be referred to by different names based on its design and size.
- Common terms include “halfpipe,” “quarter pipe,” “mini skateboard ramp,” and simply “ramp.”
- Each of these names describes a specific type of skateboard ramp, ranging from U-shaped structures like halfpipes to smaller versions like mini skateboard ramps.
- Each serves a different purpose for skate tricks and transitions.
Last Updated on July 2, 2024 by Harold Chan
DISCLAIMER (IMPORTANT): This information (including all text, images, audio, or other formats on FamilyHype.com) is not intended to be a substitute for informed professional advice, diagnosis, endorsement or treatment. You should not take any action or avoid taking action without consulting a qualified professional. Always seek the advice of your physician or other qualified health provider with any questions about medical conditions. Do not disregard professional medical advice or delay seeking advice or treatment because of something you have read here a FamilyHype.com.