
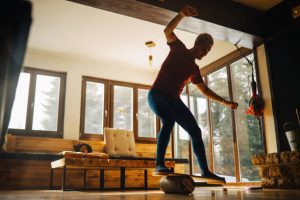
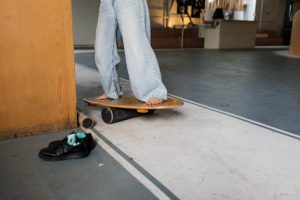
Build a DIY rocker board or balance board. A balance board is a creative way to build and enhance balance and core strength. Using a deck or board and a cylindrical object like a PVC pipe or a foam roller, you can build a homemade balance board. This balance board offers an effective and budget-friendly way to improve your balance skills in skateboard riding, making the balance board a valuable addition to your skateboard balance board training.
If you’re nervous, you should know that creating a balance board can be a breeze with the right guidance. In fact, you don’t have to buy expensive rocker-rollers from stores for you. You can watch videos from YouTube and follow the step-by-step process. This way, you can save money and other resources. Incorporating balance boards into your routine can enhance your balance training and help you master the board step techniques. By consistently practicing on a balance board step, you can significantly improve your overall balance training regimen.
This helpful tool allows you to practice your skills regardless of the weather and enhance your DIY balance, strength, and control—all of which can improve your performance. Crafting something from scratch can seem daunting, but we guarantee that this project is both fun and beneficial for all. Using balance boards in your balance training routine will help you achieve better stability.
By following our simple guide and putting in some elbow grease, you’ll have a DIY ramp of your own in no time. Whether you’re using it to improve your skills or help another master rider, creating this DIY project together can be a highly rewarding experience for everyone involved! So don’t forget to share your progress and results with us here at FamilyHype—we’d love to hear about your experience. Sharing your experience on a balance training blog or any related training blog can also inspire others in the community.
This balance board project is part of skateboard riding. It can help strengthen key skateboarding skills such as DIY balance, control, and strength. Furthermore, it’s a great way for you to bond with friends and family while mastering the art of riding. Practicing balance board step techniques and integrating them into your balance training sessions can significantly enhance your proficiency.
The primary components of this project include wood, screws, washers, and locking nuts – all of which can be found at local hardware stores. With the right know-how and a few basic materials, you can create your balance boards rocker-roller and be on your way to mastering riding quickly and easily. Additionally, understanding the width of your board and using a grip tape optional way can add to the customization of your balance boards.
Balance Board Benefits
It isn’t just for skateboarders; it’s a great way to increase coordination, core strength, and agility for your body. The rocker-roller’s benefits are undeniable. With regular use, you’ll experience improved coordination, giving you more confidence with each movement.
For you to get started with this exciting activity, you’ll need to gather together the necessary materials. Riding is a great way to enhance physical and mental strength and coordination. The benefits of using a DIY balance board are undeniable. From improving DIY balance to developing reflexes to increasing strength and stability, the benefits are undeniable. So, let’s look at the necessary materials and get started on this journey of improved coordination!
Skateboard Balance Board
At FamilyHype, our goal is to help our readers learn how to serve others by teaching them balance skills. Before starting this exciting project, it’s important for you to gather the necessary materials. We have focused our efforts on finding all the essentials, understanding their cost, and providing them in the most efficient way possible.
A skateboard balance board, designed with a wide deck to enhance stability, is an optional yet valuable tool for learning and practicing skateboarding style. It allows users to skip the long learning curve by building core strength and balance, with added features like posts to hold onto for extra support. For added customization, you can include grip tape optional to enhance your balance training experience.
To start creating a balance skateboard, the main materials needed are a sturdy plank, PVC pipe, sandpaper, and a saw. With all the materials in place, it’s time to set up a suitable work area for your DIY project. Ensuring the correct width of your board and securing everything with locking nuts will provide the stability needed for all skill levels. Sharing your progress on a balance training blog or any related training blog can also inspire others in the community. By continuously improving your balance training routine and practicing the board step, you will see significant progress in your overall balance and agility.

Preparing The Workspace For Your DIY Skateboard Project
Ensuring your workspace is well-prepared and organized is key to a successful and stress-free project. Here at FamilyHype, we’re eager to help you with that. Start by clearing an area large enough for the DIY balance board and all necessary tools. Workspace organization involves efficient tool selection, so gather what you’ll need beforehand.
It’s now time to put our prepped area to work as we dive into constructing the DIY balance board. Riding is a popular activity among families, so it’s important to have a well-organized space to get the job done. A DIY balance board is made up of several components, including skateboard decks, trucks, wheels, and bearings. Before getting started, make sure to have the right tools, such as a skate tool, screwdriver, and hex wrench. Additionally, consider the size of the board, the type of wood used for the skateboard deck, and the type of bearings used for the wheels.
Getting Ready For Work
Now we’re really getting into the fun part – constructing our rocker-roller or skateboard deck! We’ll be cutting and sanding wood to get our pieces just right, then putting everything together for a sturdy and functional rocker-roller. It’s an exciting process that requires some attention to detail but don’t worry, we’re in this together every step of the way.
Cutting And Sanding The Wood
Cutting and sanding the wood for a rocker-roller or skateboard deck is an important step in creating a board that you can be proud of. There’s something special about feeling the wood grain under our fingertips, hearing the hum of the saw as we make our cuts, and watching the dust particles dance in the light during sanding.
When we see the smooth, finished piece, there’s a sense of satisfaction and anticipation of assembling the parts. Here at FamilyHype, we understand the importance of quality construction and we’re proud to provide our readers with the resources in creating a board that’ll last. We also encourage you to explore board riding further by researching the different styles of balance boards, the components of a board, and the various types of board riding tricks. With all the pieces prepared, let’s move on for you to unify them into an amazing rocker-roller. Remember to follow the balance board step by step instructions to ensure a sturdy and functional end product.
Assembling The Parts
After all the meticulous cutting and sanding, it’s time to piece together for your custom-made ride. Here at FamilyHype, we’re proud to provide our readers with the tools they need to create the perfect board. Our tool selection includes strong adhesive and durable screws to ensure your ride is both sturdy and safe.
We’ll carefully align our pieces, using assembly techniques that guarantee a strong rocker-roller. Remember, we’re not just creating for fun but also serving others by creating a safe board-riding experience.
To ensure your board is the best it can be, there are a few essential safety considerations to keep in mind. These include the rocker-roller’s shape, wheel size and bearings, skateboard deck material, and the type of grip tape used. You need to research each of these elements to ensure you’re creating one that meets your needs. Now that our board is assembled, we can enjoy the satisfaction of creating a custom board that’s both fun and safe.
We hope you’ll share your experience with us and the rest of the board-riding community. We also invite you to leave feedback about our content and let us know how we can help make your riding experience even better.
Safety
Before we dive into the DIY fun, let’s take a step back and make sure we’re doing this project correctly for our safety. Here at FamilyHype, we value the family unit, and that includes riding, so let’s make sure we’re taking the right safety precautions.
Whether you’re riding or creating your own rocker-roller, you should always follow these guidelines:
Protective Or Safety Gear: Always wear the necessary protective gear during construction and use.
Accident Prevention: Make sure your workspace is clear of any potential hazards.
Tool Safety: Use tools correctly and safely.
Moreover, you should be careful when using sharp tools such as utility knives, hand saws, and screwdrivers. You could use a role to challenge the balance and a watch to time yourself on the deck. Following these simple tips should ensure that you enjoy your DIY project responsibly. Now that we’ve covered the safety considerations, let’s explore how to make the most of your custom rocker-roller!
Balance Skateboard
So, you’ve got your homemade Marvel ready for action, haven’t you? No need for a complicated service to make a rocker-roller. You’ve achieved this all by yourself already. Thanks to the amazing videos and tutorials online. Now let’s delve into the art of mastering its use while whipping up some fun.
Board optimizations and personal customization can make a world of difference in your riding experience. At FamilyHype, we’ll help guide you on how to properly use your DIY rocker-roller. Together, we’ll create an unforgettable adventure filled with excitement and skill-creating. Whether you’re a beginner or an experienced rider, you’ll find plenty of tips and tricks to make the most of your rocker-roller.
We’ll discuss how to adjust your rocker-roller for a comfortable ride, how to choose the right parts, and what safety measures to take before you hit the streets. With our help, you’ll be able to customize your rocker-roller for your exact specifications, so that you can truly enjoy the ride.
Don’t forget to share your experience and opinions with us! We’d love to hear your thoughts on mastering your rocker-roller and turning your board-riding dreams into a reality.
Conclusion
We’ve enjoyed an exciting journey creating a DIY rocker-roller for your board riding practice. This project is not only a cost-effective way to enhance your skills but also a satisfying experience in crafting with your own hands. Suitable for both new enthusiasts and seasoned skaters, assembling your own balance board is a rewarding way to boost balance and core strength.
Although starting the project might seem daunting, with practice and perseverance, you’ll master its functionalities. These boards are excellent for cross-training, helping to improve your balance, teach new tricks, and refine your skills.
Once your board is complete, consider sharing your work online on platforms like Reddit or specific board-riding forums to gain insights and inspire others. There are also apps to track your progress and challenge friends, making this project a practical tool and a creative outlet that connects you with a community of skaters.
Frequently Asked Questions
Can You Use A Board For A Rocker-Roller?
Yes, you can use one as a DIY balance board to practice and improve your balance skills. It can help strengthen core muscles and improve stability.
How Do You Make A Homemade Rocker-Roller For Yourself?
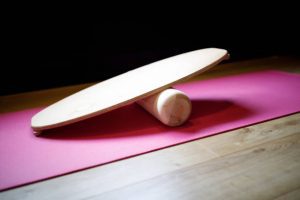
To make a homemade rocker-roller, you’ll need a sturdy board or plank and a cylindrical object like a piece of PVC pipe or a wooden dowel. Attach the piece of PVC to the center of the rocker-rollers, allowing it to pivot freely.
How To Practice Balance On My Board For Me?
You can practice balance on your skateboard at home by standing on the rocker-roller with both feet and engaging your core muscles to maintain stability. Practice shifting your weight from side to side and finding your center of balance. Alternatively, you can make a balance board using an old skateboard deck or multiple balance boards, including a skate balance board.
Why Can’t I Keep My Balance On A Board?
Maintaining balance requires practice and developing muscle memory. Lack of balance may be due to weak core muscles or improper weight distribution. Aside from this, you can’t keep your balance on a board, especially when standing on one foot, because balancing on boards can be tricky, but with practice and optional support like a wall, kids can improve their balance skills, and you can purchase an inexpensive board with a tail to help. Consistent practice and proper technique will improve balance over time.
How To Balance On It For Beginners?
For beginners learning to balance on a board, it makes it easier to start by using a bit of support like a gym wall or a friend to grab onto. As you gain confidence, you will realize that balance becomes easier with practice. To reduce wobbling, focus on keeping your weight centered and distributing it evenly on both feet. Engage your core muscles and practice maintaining a stable stance while riding.
What Is The Best Surface For A Rocker-Roller To Balance?
The best surface for a rocker-roller to balance is a flat one without edges, blocks, or paint, ensuring a cool and smooth rolling experience. A non-slip surface like grip tape or rubber on the top of the rocker-roller is ideal for providing traction and preventing slipping during balance exercises.
How To Make A Cheap Rocker-Roller For Me?
To make a cheap rocker-roller, repurpose materials like a sturdy wooden plank and a PVC pipe or a wooden dowel. Assemble them securely to create a simple and cost-effective rocker-roller.
How Thick Should A Rocker-Roller Be?
The thickness of a rocker-roller can vary, but it should be sturdy enough to support your weight without bending or flexing excessively.
What Can I Use As A Rocker Roller?
Aside from commercial rocker-roller, you can use a skateboard, a wooden plank with a cylindrical object underneath, or even a foam balance pad as an alternative.
How Do You Make A Wooden DIY Rocker-Roller For Home Use?
To make a wooden rocker-roller, cut a circular shape from a piece of sturdy plywood or use a wooden plank. Attach a cylindrical object like a PVC pipe or a wooden dowel to the center of the board’s underside to create a pivot point.
Last Updated on June 30, 2024 by Bernadine Racoma
DISCLAIMER (IMPORTANT): This information (including all text, images, audio, or other formats on FamilyHype.com) is not intended to be a substitute for informed professional advice, diagnosis, endorsement or treatment. You should not take any action or avoid taking action without consulting a qualified professional. Always seek the advice of your physician or other qualified health provider with any questions about medical conditions. Do not disregard professional medical advice or delay seeking advice or treatment because of something you have read here a FamilyHype.com.